1. Shoot a test roll of film, bracketing
exposures to zero-in on limits (1 hour)
A. variables
= film speed, exposure, filters
2. Develop film, print and examine
"proofs" (1 hour)
If your intial
guesses weren't in ball park, go back to #1 (How good are you at guessing
X 2 hours)
A. variables
= paper contrast & speed, exposure, filters
3. Capture your images while bracketing
within what you learned from #1 & # 2 (1 hour)
4. Develop your images (1 hour)
The fastest turn around time you could expect involved 4 hours of time commitment. That's assuming that you had excellent skills in photomicroscopy, darkroom technique in film development and printing [something you may aquire by spending 2-8 additional hours]. These four hours were the minimum amount of time it would be required just to get a decent image from a microscope that was perfectly adjusted from a perfectly sectioned specimen.
Now, you can accomplish all the above via digital interface. You can apply WYSIWYG in real time! You don't have to spend 4 hours to view what you capture and hand in. You can now actually hand in at the end of class what you learned in any particular exercise, so you and I know exactly what you learned!
Another advantage of digital image capture is that you can import your images into image processor routines to manipulate various properties of the image. You will be using PaintShop Pro to do this in your exercises. You can also import your images into image analysis routines to make quantitative measurements on your images, if you have calibrated them. The latest version of the Spot II software has limited image analysis capabilities. The MU Electron Microscope Facility has several computers that run Image Pro Plus which has extended image analysis capabilities.
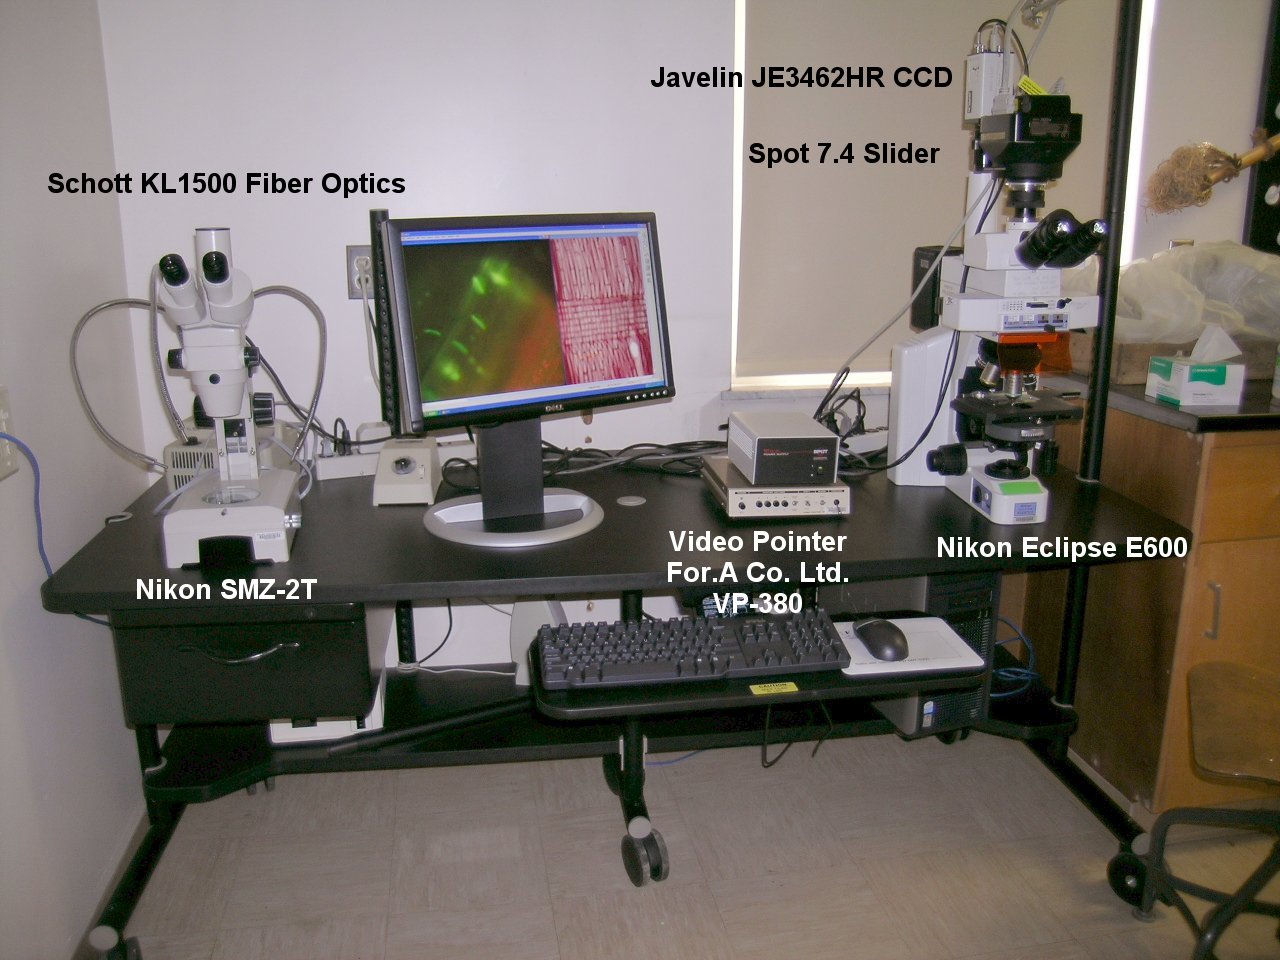
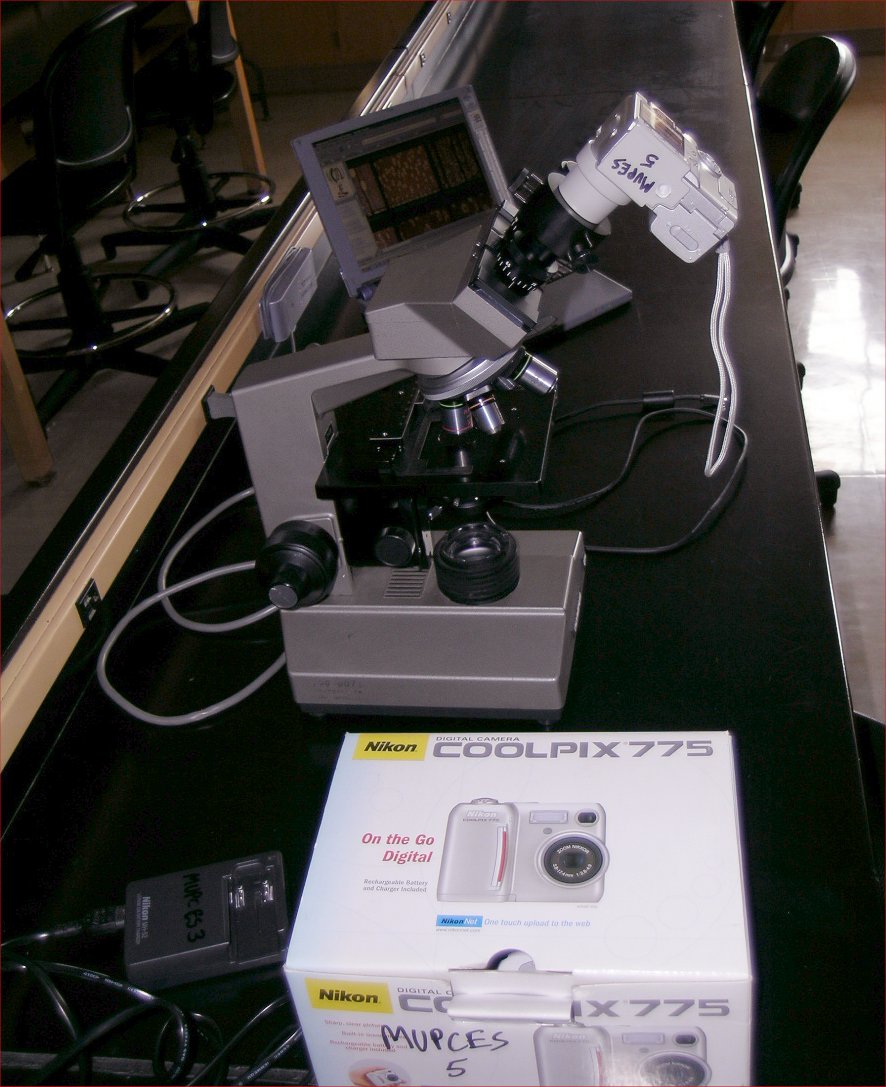
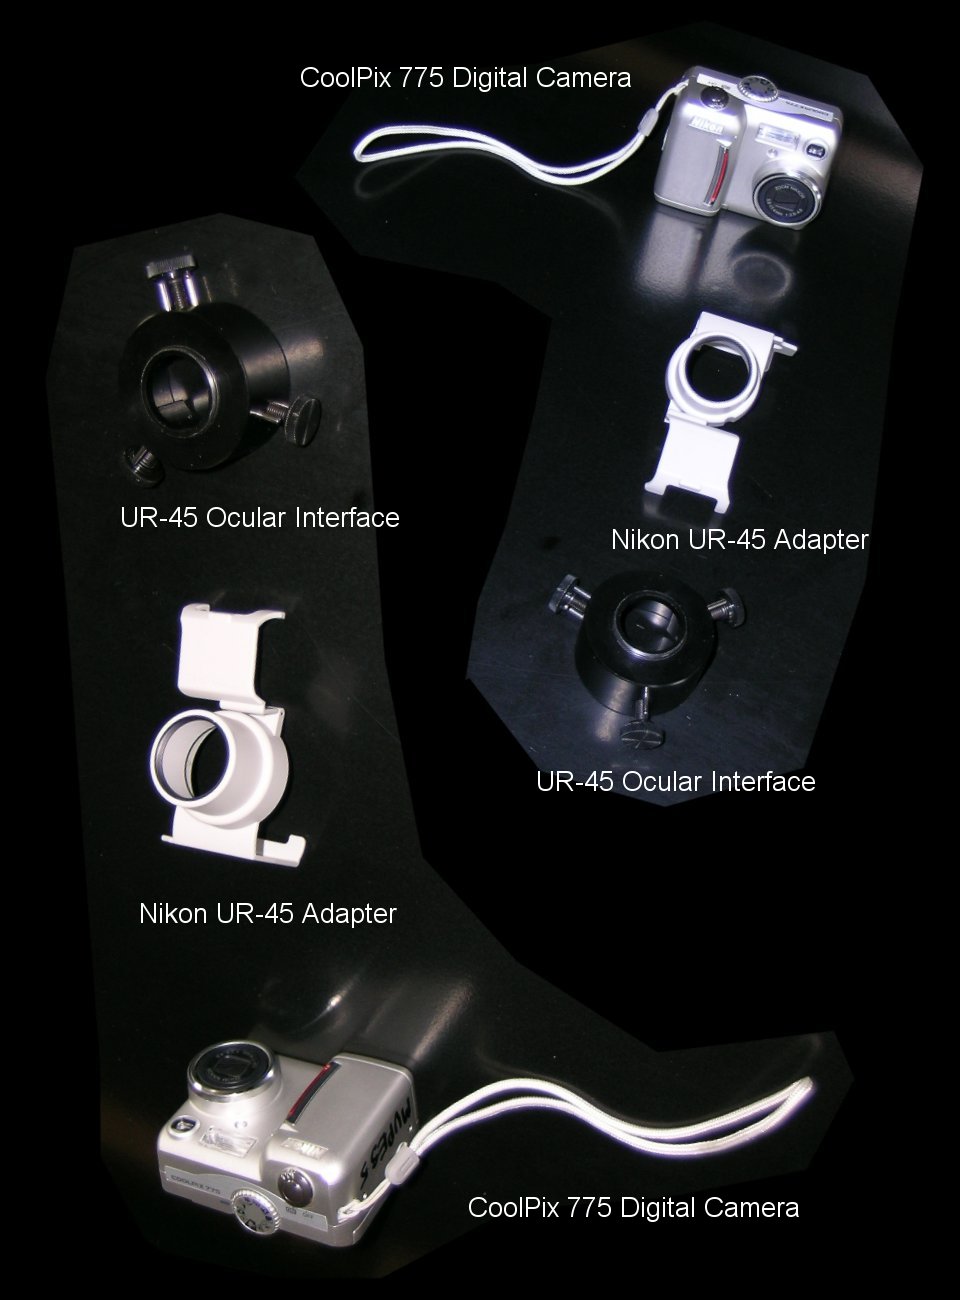
In this exercise you will become familiar with the operation of the Spot II CCD interfaced with a Nikon compound light microscope and a desktop computer that you will be using in subsequent exercises to capture images of plant material that you will be studying. The Spot II camera and Nikon microscope represents the highest digital light microscopic capabilities currently available to you at MU. It is much used by graduate students and faculty in their research endeavors. You will be trained in the use of these instruments, but for most of your lab exercises you will be using your Olympus Student Microscopes and the Coolpix775 digital camera, which can be directly interfaced with your Q1 computers.
This latest capability can be directly attributed to the success for the MU-LTEP/NSF funded long term MUDES project and indirectly to Hughes Foundation Grants to MU. We currently have six Coolpix775 systems. Depending on class size, you can either assume ownership of a camera, or arrange sharing arrangements with your colleagues for the semester. Either way, you will now have the capability to capture most laboratory exercise images directly to the CoolPix and then upload them to your laptops, for subsequent incorporation into your electronic labooks. This should eliminate a lot of the "bottle-neck" frustrations experienced by your colleagues in the past.
Take the time now to learn how to effectively use both these tools as you will need these skills for completion of your electronic laboratory exercise sheets.
The Nikon compound light microscope and Spot camera can be configured to do high resolution imaging using:
1. Bright Field Imaging
2. Polarized Light Imaging
3. Hoffman Contrast Enhancement Imaging
4. Fluorescent Imaging (NB. If you intend to do Fluorescent Imaging, You MUST SHUT THE COMPUTER COMPLETELY OFF before turning on the Mercury Lamp. Failure to do this could result in destroying the circuitry of the computer! The Mercury Lamp must be left on for a minimum of one half hour to prolong the lifetime of the filament. Please remember to shut off the Mercury Lamp after you are done.)
The Olympus compound light microscope and CoolPix camera can be configured to do low resolution imaging using:
1. Bright Field Imaging
2. Polarized Light Imaging
Learn how to use these different types of microscopy so that you can take advantage of them in subsequent exercises.
Later on you may wish to consult the more in depth users guide for the Spot CCD.
2. Capture three images of fresh Elodea
leaves and three images of the stage micrometer using the 4 X,10X, and
40X Objectives with the CoolPix CCD. Upload and store these
images in your image subdirectory on your laptop.
3. Capture an image of a CD-R bit track to prove that you can establish Kohler illumination with your student microscope.
3. Complete the laboratory exercise sheet.