Activity 1: Getting to know the fauna on your face: Discovering Demodex Mites (adapted from The Diversity of Life by E.O. Wilson)
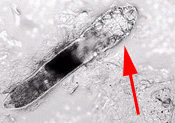 |
In this activity you will look for your own Demodex mites. The mites will look something like the one in the picture to the left of the screen. |
Materials:
- Microscope slide and cover slip
- Emersion oil or other clear, viscous substance (although I haven't tried it, I would think baby oil would work.)
- Butter knife or metal spatula (note: use the dull edge of the butter knife!)
- Microscope
Procedure:
- Pull the skin of your forehead taught.
- With your other hand, use the dull edge of the butter knife to scrape across the surface of your skin. Apply enough pressure so that small amounts of oily material are expelled from the sebaceous glands.
- Remove the material collected on the edge of the butter knife by gently sliding the cover slip across its surface.
- Place a drop of immersion oil onto the microscope slide, and then lay the coverslip (with the scrape sample facing downward) onto the drop of oil.
- Place on a compound light microscope, and look for the very little worm-like mites like the one in the above photo.
Activity 2: The diversity within: Examining the Microbial World within a Termite's Digestive Tract
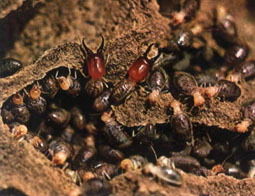 |
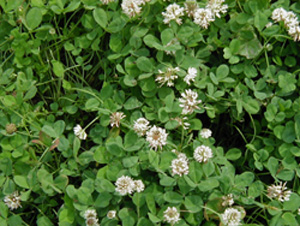
For this activity you will be using live termite specimens (If you were to use dead ones, what would have happened to the symbionts of the digestive tract?). These specimens can be obtained through biological supply companies (there are plenty of them to be found on the internet), or you could go outside collect a rotting chunk of wood from the forest and search for them there. Note that most of the termites will not be nearly as impressive as the two soldiers in the center of the photo on the left side of this page. Look for the tiny, white workers walking around in channels within the wood--they have plenty of life within! |
Materials:
- Termites (any species)
- Microscope slide and cover slip
- Microscope
Procedure:
- Place the termite on the slide and hold it in place by putting a finger on the head and thorax.
- Place the cover slip over the termites abdomen (its back part) and push downward (be careful not to break the slide or cover slip!). You should observe the liquid contents of the digestive tract being expelled.
- Place the slide on a compound microscope and observe.